Tuesday, November 2, 2010

Autumn Pumpkin Rolls

Well, today I am bringing another Pumpkin recipe for you to try, Autumn Pumpkin Rolls, a soft and fluffy yeast bread, just perfect for the Autumn season!  I think these would be perfect to serve with Thanksgiving dinner, or even just as an afternoon snack.  I divided the dough into one loaf for slicing, and then formed the remaining half of dough into 8 "pumpkin" rolls.  This bread reminds me quite a bit of potato bread, the pumpkin acting like mashed potato, adding moisture and softness.  The pumpkin flavor is quite mild, but the pumpkin gave a deep and beautiful golden hue to the bread, reminiscent of fallen leaves.
Autumn Pumpkin Bread:
Ingredients:
1 cup warm milk
1 teaspoon sugar
2 1/2 teaspoons active dry yeast
1 egg, scrambled
1/2 teaspoon salt
1/4 cup melted butter
1 cup pumpkin, mashed
4 1/2 cups flour, plus more as needed, for kneading

To prepare:
1. In a large bowl, combine the warm milk, sugar and yeast, stirring well to combine.  Allow to rest in a warm place about 15 minutes, until the yeast is frothy and foaming.
2. Add the scrambled egg, salt, melted butter and mashed pumpkin to the milk/yeast mixture, and stir well.
3. Add in the flour, (you can use an electric mixture if you like, but I like to do it by hand) combining well until the dough forms a soft and somewhat sticky dough.
*Tip*- the magic of bread making really happens at this point.  Add more or less flour until the dough "feels" right.  Bread is very much affected by your environment, if it is hot and moist you may need more flour, if it is cool and dry, you may need less.  Just listen to the dough and you will have perfect bread every time!!
4. Turn the ball of dough onto a well floured surface, and knead until soft and slightly elastic to the touch (dough will return back when indented with your fingertip), about 5-6 minutes, adding more flour as necessary.
5. Place the dough into a slightly oiled bowl, cover loosely, and set in a warm place until doubled in size, about1 hour.
6. Form the bread: cut the dough in half, gently rolling one half into a loaf, and place into a lightly oiled (you can use cooking spray) loaf pan.  Cover and set aside for about 20-30 minutes to rise for the second time. Cut the remaining dough in to 8 pieces of dough.  Form each in to a ball, and then gently score around the sides to give the rolls a "pumpkin" appearance (make vertical cuts from where the stem would be, down the sides to create grooves, all around the "pumpkins").  Place the rolls about 2 inches apart on a foil lined baking sheet, cover, and allow to rise for an additional 30 minutes.
7. Place the bread into a preheated 350 degree oven, baking the loaf for about 30 minutes (until golden and sounds hollow when "thumped" on the bottom of the loaf), and the rolls for about 20-25 minutes.
8. Allow the loaf to cool about 15 minutes before removing from the loaf pan.
9. Serve and enjoy!!! :)

Saturday, October 30, 2010

Pumpkin Gnocchi with Creamy Gorgonzola and Sage

Well, it's my favorite time of year again, Autumn!  Crisp winds scatter fallen leaves across the yard, bringing the feeling of Winter just around the corner.  I happen to love Autumn, as it always feels like a magical time of year.  Not only that, I love being in the kitchen in Autumn, the perfect time for preparing roasted root veggies, using pumpkins and sweet potatoes, and stirring large pots of simmering stews and soups.  There is just something so satisfying about creating a hearty recipe for the family to enjoy on a cool evening.  So today I am posting my latest Autumn recipe, a delightful Pumpkin Gnocchi, with an intensely flavorful Gorgonzola Sage sauce. We have been eating quite a bit of homemade gnocchi lately, although I have been making it with Sweet Potatoes.  So I decided to try a new twist (for us anyway), and went with Pumpkin this time instead!
The best way for simple, delicious and flavorful cooked pumpkin?  Use one of the small "sugar" or "Pie" pumpkins (about 5-6 inch pumpkins), and place in a 350 degree oven for about an hour and 15 minutes.  The skin will darken, and the pumpkin will be soft to the touch when baked.  Then simply cut off the top (around the stem), use a spoon to scoop the pulp and seeds out, and then use the spoon to remove all of the deliciously baked flesh of the pumpkin.  Each small pumpkin provides about 2 cups of mashed baked pumpkin, just perfect for a recipe, whether it's Grandma's pumpkin pie, Pumpkin bread, or this recipe for delicious Pumpkin Gnocchi! I like to buy 5 or 6 pumpkins at a time, bake them, and store the mashed pumpkin in the freezer (in freezer storage bags, 2 cups per bag), completely eliminating the need for canned pumpkin. I find canned pumpkin to be so flavorless, or to just taste like the "can", and have realized that I just love the flavor of the freshly baked pumpkin so much more!  I hope you'll also make your own pumpkin to use, ensuring that you have rich and flavorful pumpkin with no preservatives or lack of flavor(or poor quality)!

Pumpkin Gnocchi with Creamy Gorgonzola and Sage:
Serves: about 6
Prep Time: about 30 minutes
Cook Time: about 30 minute all together

Ingredients:
For the Gnocchi:
2 cups pumpkin mash, (baked, mashed pumpkin)
2 egg yolks
1/2 teaspoon sea salt, or to taste
1/2 teaspoon peppercorn medley, freshly ground (mine includes black, red, green and white pepper, coriander, and allspice), or to taste
1/4 teaspoon nutmeg, ground
1 cup unbleached white flour
1 1/2 cups whole wheat flour
additional white flour for rolling out the gnocchi
salted water, for boiling the gnocchi

For the Creamy Gorgonzola and Sage sauce:
1/4 cup butter
1/4 cup finely minced sage leaves, fresh
4 ounces Gorgonzola cheese, crumbled
2 Tablespoons milk (or cream if you desire)
freshly ground peppercorn medley, to taste

To prepare:

In a medium size bowl, combine the mashed pumpkin, the egg yolks, sea salt, pepper, and nutmeg, stirring well to fully combine.  Add in the white and whole wheat flour, and stir with a fork, just till combined, being careful not to over stir.  The dough will be sticky, and soft.
Place a large pot filled two-thirds with water over high heat, making sure to salt the water (this will be used for boiling the gnocchi). While the water is coming to a boil, form the gnocchi:
Liberally dust a board with white flour, as well as your hands.  Use a spoon to scoop out a golf ball size ball of dough, and place on the floured board. Very gently roll the ball of dough into a "snake" about 1 inch thick.  Use a sharp knife to cut the snake into about 1 inch pieces.  Be careful not to overwork the dough, as this could cause your gnocchi to become tough.  Using a fork dipped in flour, gently press the tines onto the top of each gnocchi, creating ridges (these are what help hold onto the sauce for the best flavor!). You can form the gnocchi all at once, or I like to just roll out 2 snakes at a time, form the gnocchi, and then boil just that amount at one time, so that I don't over crowd the pot (and it's the perfect amount of time to form more gnocchi while the first batch cooks!).  To boil the Gnocchi: Gently slip the formed gnocchi into the boiling water, and then carefully stir once (to prevent the gnocchi from sticking). Allow to boil until they float to the surface (about 4-5 minutes), and then use a large slotted spoon to remove the gnocchi to a strainer. Repeat with remaining gnocchi until all are cooked.
Once the gnocchi are all formed and boiled, you can freeze some for later if you don't need it all (just place in a single layer on a baking sheet, place in the freezer until frozen, then place the frozen gnocchi into a freezer bag, ready to prepare with sauce after they are thawed). Or, use all the Gnocchi with the Creamy Gorgonzola and Sage sauce below!
To create the sauce: Place the butter in a very large skillet (12 inch or larger) and place over medium heat.  Allow the butter to melt, then add in the minced sage.  Allow the butter to slightly brown while the sage infuses it's flavor, being careful to either swirl the pan or stir continuously, to prevent burning. Add in the cooked gnocchi, stirring well to evenly coat the gnocchi.  Add in the crumbled Gorgonzola, continuing to stir until the cheese is completely melted.  Add in the milk (or cream), and the ground pepper (to taste), and stir until the sauce is creamy and fully coats the gnocchi.  You may add salt if you desire, but I found the Gorgonzola to be salty enough for my taste.
This dish makes about 6- 1 cup servings, and as it is so rich and flavorful a little goes a long way!  Serve on a plate and garnish with additional minced sage, if desired.  Enjoy!!

Tuesday, September 28, 2010

A New Zealand Escape, and Inspiration from Kiwifruit!


Bush Walk to Mauao Summit
Bay of Plenty, 
New Zealand
Today, I would like to take you all on a fabulous journey to the lush volcanic region of the  Bay of Plenty, in beautiful New Zealand!  Breathtaking views seem to abound in this area, with sandy beaches, active volcanoes, and lush tropical forests. To be honest, I had only slightly heard of The Bay of Plenty before a few weeks ago, when I found out about a contest by the Zespri Kiwifruit company. The contest is for bloggers, and they are looking for posts inspired by Kiwifruit and/or The Bay of Plenty, New Zealand. I have always loved Kiwifruit, so was instantly inspired by that; and the interesting thing is that my husband had just told me prior to finding out about the contest that he would really enjoy eating more Kiwifruit because he loves it.  And so we have been!  And how I have loved the results!  I will go into more detail on the wonders of Kiwifruit, but first, let me tell you what I've learned of The Bay of Plenty!  I have discovered that this is my new dream vacation location!  
White Island, Bay of Plenty, New Zealand
I have always been intrigued by volcanoes, and the Bay of Plenty has some truly remarkable and beautiful volcanic activity! The White Island (shown above), is an absolutely stunning active marine volcano, and if you ever have the chance to visit, they even offer tours (walking or by helicopter) of the volcano! Mount Ruapehu is another active volcano, and volcanic activity can be seen in many locations. Outdoor adventures abound in this beautiful region of New Zealand, as well as a rich culture to be explored!
Maori Warrior at Sunrise, Bay of Plenty, New Zealand

 The Maori culture seems to be very active in this area, and there are many ways to experience it during a stay in the Bay of Plenty, through traditional arts and crafts, museums, demonstrations, and more. They also have the longest running jazz festival in the southern hemisphere (held in Tauranga)! The Bay of Plenty is also home to quite possibly the best place on the planet to grow Kiwifruit, with rich volcanic soil, ideal growing conditions, and wonderful quality water! The Bay of Plenty truly is overflowing with bountiful growth and the name is so perfect for this plentiful region! So whether you are looking for beaches, mountainous hikes, water sports, or experiencing new cultures, Bay of Plenty seems to have it all! When you are planning your next vacation get-away- think of Bay of Plenty, New Zealand for the trip of a life time!!

Main Beach, Mount Maunganui, Bay of Plenty, New Zealand
And here's a chance for that to happen for you now!  Not only is Zespri running a contest for bloggers (called the Zespri Kiwi A-Go-Go Bloggers Contest, with an amazing adventure of a lifetime vacation package to the Bay of Plenty as the Grand Prize), they are also running a sweepstakes give-away of a trip for 4 to the Bay of Plenty!  So you have a chance to experience this amazing destination, just by clicking this link for the Great Kiwi Adventure and entering the drawing! The prize is an adventure packed 7 day trip to Bay of Plenty, New Zealand, with airfare, a beach-side villa, a White Island tour, a Swim with the Dolphins Encounter, a glow-worm kayak trip, a helicopter tour, an orchard tour, a jet boat tour, and more!!!  Believe me, you do not want to miss out on this amazing trip, follow the link for your chance to win!
Mount Maunganui Beach, Bay of Plenty, New Zealand
And here's a way for you to bring the Bay of Plenty into your own home, by enjoying the delicious benefits of the amazing Kiwifruit!  After doing further research, I have discovered that Kiwifruit just might be the best fruit on earth, and we could all benefit from enjoying it on a regular basis (as often as 2 kiwifruit a day for optimum benefits!)!  2 Kiwifruit (which are actually a member of the berry family) make one serving, and they are higher in vitamin C than an orange, have as much potassium as a banana, and contain more fiber than a serving of bran flakes!  Not only that, they are full of antioxidants with cancer fighting power, boost heart health (equal to as much as an aspirin a day, but so much more delicious, wholesome and natural!), can prevent age-related macular degeneration (loss of eye-sight), are a good source of nutrients for diabetics, can aid in digestive health, and have a slew of other benefits!  Check out this link to Zespri's health benefits of kiwifruit (and browse their website, it's packed with amazing recipes, and a wealth of information about kiwifruit!), and be inspired in your kitchen with this amazing SUPERFRUIT!
But, not only is the amazing Kiwifruit full of health benefits, it is extremely delicious, and beautiful!  I have found that it can add a delightful touch to any meal of the day.  I will be honest, before this contest, I would usually just eat the Kiwi as fresh fruit, put it in fruit salads, or possibly make this breakfast dish shown to the right, which is simply one green Kiwi, sliced, and glazed with a touch of honey and cinnamon. So when I heard of this contest, I decided to take a much more adventurous approach, and to experience Kiwifruit in all new ways in my kitchen!  I hope you feel as inspired by these green or golden beauties as I have, and create some truly delicious and unique recipes of your own!  I am sharing a selection of recipes with you today that I have really enjoyed creating, and hope that you try them soon, in your kitchen.  For those of you less familiar with the beautiful Kiwifruit, here is a photo of a green Kiwi (on the left), and a gold Kiwi (on the right).

You can see that the green Kiwi has a fuzzy skin, whereas the gold Kiwi has a smooth skin.  Here is a photo of the beautiful interior of the tangy yet sweet, Green Kiwifruit:

And of the sweet, delightful, and tropical tasting, Gold Kiwifruit:
With a multitude of uses in the kitchen, Kiwifruit truly can enhance your dining experience.  And Zespri is a great brand to use, with positive growing practices, even offering organic Green and Gold Kiwi. You can also rest assured, knowing your Kiwi was grown in one of the best places on earth, the Bay of Plenty, New Zealand! The Kiwi is in season from about May-October, so now my next adventure will be to try making some Kiwi preserves, so that I can enjoy them throughout the winter as well! But for now, I'm enjoying this incredibly flavorful and delicious in season fruit as many ways as I can. 

For my first recipe, I would like to share this fabulous cocktail, that I call the "Green Kiwi Escape", which I think would be a fantastic addition to your next gathering with friends.  Beautifully green, tart, yet sweet, full of the flavor of delicious green Kiwifruit, and absolutely crisp and refreshing.  Simple to make, and a delightful new flavor combination to be enjoyed with loved ones and friends.

This cocktail would be the perfect beverage to serve while guests are waiting for the meal to be served, or as an after dinner drink, to finish a delectable meal (try serving with my recipe for Pan Seared Kiwi Citrus Halibut over a Bay of Plenty salad, recipe further below!).
 
The Green Kiwi Escape Cocktail:
serves: 1
 Ingredients:
1 tablespoon honey
1 Zespri Green Kiwi
2 leaves pineapple mint, plus a sprig of pineapple mint for garnish
1 1/2 ounces Midori (melon liquor)
1 1/2 ounces white rum
4 ounces tonic water
1 wedge of green kiwi, for garnish
ice

To Prepare: Puree the green Kiwi (remove the peel, and be careful not to over-puree and crush the seeds, as the seeds may become bitter) with the honey and the 2 leaves of pineapple mint (about 1 1/2-2 teaspoons of minced mint).  Add the honey/Kiwi/mint puree to a cocktail shaker, along with the melon liquor and the white rum.  Cover, shake until fully combined, and add in the tonic water.  Pour into a highball glass filled with ice, and garnish with a sprig of pineapple mint, and a slice of Kiwi. Sit back, relax, and feel taken away to a delightful retreat in New Zealand!
Mount Maunganui at Sunset, Bay of Plenty, New Zealand

Inspired by the breathtaking image above of a sunset over Mount Maunganui, I have created a deliciously tangy, sweet and refreshing drink, The Mount Maunganui Mocktail!  It is truly a Superfruit drink!  With Pomegranate juice, Acai berry juice, and  delicious Gold Kiwi, each sip is sure to refresh and revitalize you! Along with the Gold Kiwi full of the nutrients listed above, I've added an extra punch with the Pomegranate (full of antioxidants, amazingly cancer fighting, heart healthy, and more!), and Acai (also full of antioxidants, can lower blood pressure, and more!). I hope you enjoy this nutrient rich, invigorating, and beautiful beverage! I have tried to include all of the colors of the sunset (Golds, Reds and Purples) over Mount Maunganui, and felt that the only thing that could improve the flavor of this drink would be to sip this beverage on the beach, overlooking the view in person!

The Mount Maunganui Mocktail:
serves 1

Ingredients:

1 Zespri Gold Kiwifruit
1-2 Tablespoons Honey, to taste (or you can substitute Agave Nectar)
2 ounces Pomegranate juice
2 ounces Acai Berry juice
2 ounces Ginger Ale
1 slice Zespri Golden Kiwifruit, for garnish

To Prepare:

Blend the Golden Kiwifruit (you may remove the skin if desired) with the honey, just until the Kiwifruit is fully pureed. Add the pureed Kiwifruit with the Pomegranate juice and Acai berry juice to a cocktail shaker.  Cover, and shake until fully combined. Pour the Ginger Ale into the Superfruit juice blend, and then pour into a Highball glass full of ice.  Garnish with a slice of Golden Kiwi, and enjoy!

And now that we have been refreshed with some fantastic Bay of Plenty inspired beverages, we will move on to the perfect, cooling appetizer!  This chilled Kiwi soup is the perfect start to a delicious meal, savory, yet sweet, soothing and satisfying at the same time!  This is actually a chilled kiwi soup, two ways.... I have served a wonderful small dish of the chilled soup, along with the perfect mouthful (a delightful amuse-bouche for your guests!) of components from the soup.  This way, you can enjoy all of the great textures of the ingredients, and are able to savor it in a couple different ways.  I hope you'll give this recipe a try, and will enjoy having kiwi in a savory/sweet appetizer!

Chilled Kiwi Soup with a Kiwi Amuse-Bouche. 
Serves: 4

Ingredients:
For the Chilled Kiwi Soup:
1 tablespoon Extra Virgin Olive Oil1/4 cup Shallots, minced
1/4 cup Green Onion, chopped
1/4 tsp. Sea Salt
1/2 tsp. Peppercorn blend, freshly ground
2 Zespri Green Kiwifruits
2 Cucumbers
1/2 cup Temptation melon (orange-flesh honeydew), diced
1/2 cup Grapefruit Juice
2 tablespoons Honey
3 slices Prosciutto, very thin
diced Avocado, for garnish
diced Green Kiwi, for garnish


For the Kiwi Amuse-Bouche:
4- 1 inch thick slices of Zespri Green Kiwifruit
8- 1/2 inch thick slices Temptation Melon (about 1 1/2 inches long)
4- 1/2 inch thick slices Avocado
1 slice Prosciutto, cut into 4 long, thin strips

To Prepare:

Add the olive oil to a small skillet, and place over medium high heat.  Add in the minced shallot, minced green onion, sea salt, and peppercorn blend (my pepper blend includes: black, green and red peppercorns, coriander and allspice), stirring frequently, until shallot begins to caramelize, about 3-4 minutes. Remove from heat, and place the shallot mixture in a large bowl. Remove the peels from the Kiwifruit and cucumber, and the rind from the melon, and place the fruits/vegetables into the bowl with the shallots.  Add in the grapefruit juice and the honey, and use an immersion blender to puree completely (being careful not to over-puree and grind the seeds).  You can use a regular stand type blender if an immersion blender is unavailable. Cover the bowl, place into a refrigerator, and chill at least one hour.
While the soup is chilling, prepare the prosciutto garnish.  Preheat an oven to 350 degrees.  Place the 3 slices of prosciutto onto a piece of foil, and place in the preheated oven. Bake for about 8-10 minutes per side (flipping over after 7-10 minutes), till prosciutto has darkened in color (watch carefully to prevent burning), remove from the oven, and cool about 10 minutes.  Crumble the prosciutto into small bits.  Set aside until ready to serve.
Right before serving the soup, prepare the Kiwi Amuse-Bouche:
Place the 4 long strips of prosciutto on a cutting board, and set 1 thick slice of Green Kiwi on the center of each strip. Set two slices of melon and one slice of avocado on top of each slice of kiwi, wrap the prosciutto strip up around the fruit, and gently tie to secure it together.
To serve:
Divide the soup among 4 small chilled serving bowls. Garnish each with the crispy, crumbled prosciutto, as well as some diced Kiwifruit, and diced avocado.  Serve each dish with one of the Kiwi Amuse-Bouche, and enjoy!


And now it is time to move on to the main course!  This dish is truly inspired by the Bay of Plenty, succulent and rich with seafood, Kiwifruit, avocado, and citrus, all bountiful harvests readily available in this region of New Zealand.  I have incorporated other complimentary flavors and textures for an entree salad you will not soon forget!  I have used Halibut in this recipe, but you can substitute another type of firm, white fish if desired.  Simple and quick to make, but so elegant and full of flavor!  The Kiwi really shines in this dish, as I have used Kiwi in the dressing, which was also used as a marinade for the fish, as well as serving each salad atop a bed of 4 green Kiwi slices, adding Kiwi to every bite! Kiwifruit is a natural meat tenderizer, and although Halibut is a tender and delicious fish (when cooked properly), I could tell that the Kiwi added even more of a tender succulence to the finished dish.  If you are looking for an escape to the coast, and a beautiful retreat to the flavors of the Bay of Plenty, try this elegantly simple recipe!

Pan Seared Kiwi Citrus Halibut over a Bay of Plenty Salad
Serves: 4

Ingredients:
 For the Kiwi Citrus dressing and marinade:
3 Zespri Green Kiwifruit
1/4 cup Orange Juice, freshly squeezed
1/4 cup Lime Juice, freshly squeezed
2 tablespoons Extra Virgin Olive Oil
1/2 teaspoon Ginger Paste
1/4 teaspoon Sea Salt
1/2 teaspoon Peppercorn blend, freshly ground
2 tablespoons Honey
1 tablespoon Thyme Leaves

For pan searing the Halibut:
1 Tablespoon Extra Virgin olive Oil
4- 4-6 ounce Halibut Fillets 

For the Honey Ginger Macadamia Nuts:
1/2 cup macadamia nuts
1 tablespoon honey
1/2 teaspoon ginger
1/2 teaspoon sea salt

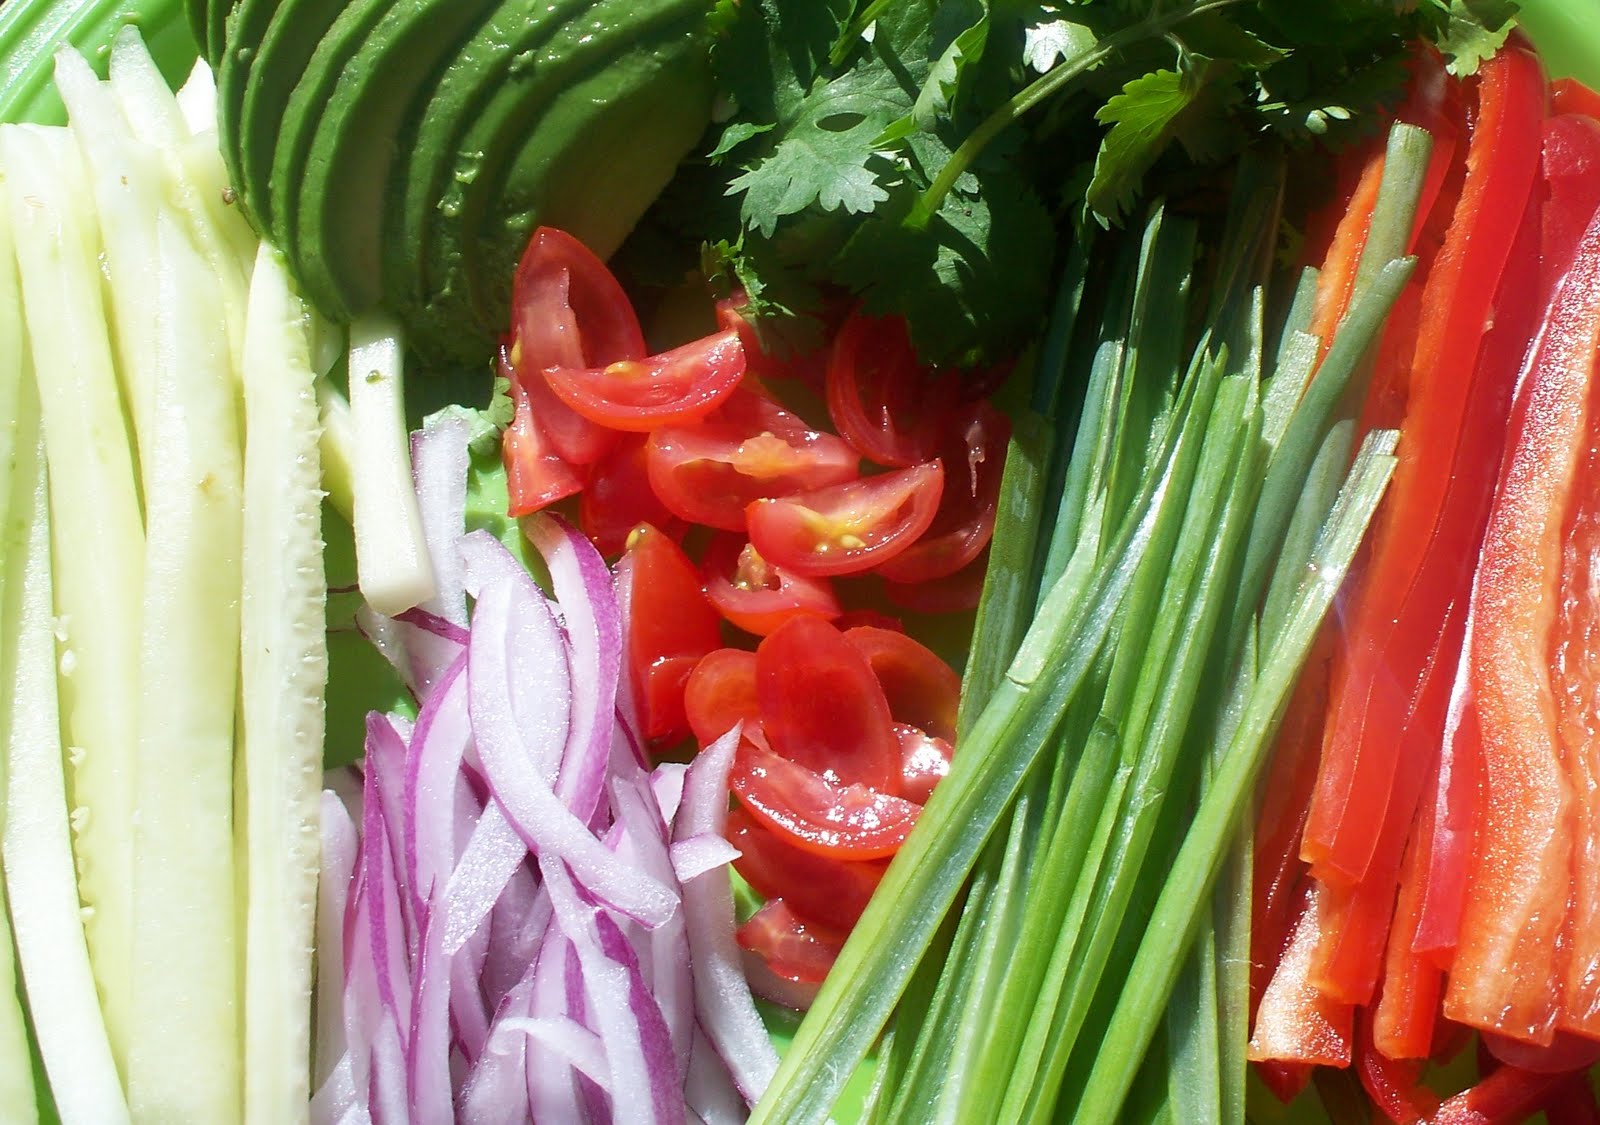
For the Bay of Plenty Salad:
1/2 cup dried, sweetened cranberries
1 avocado, cut into bite-size pieces
1/2 cup diced hearts of palm
4 large handfuls spring greens mix
1-2 Zespri Green Kiwifruit (sliced thinly for placing under the salad)

Garnish:
4 slices of orange, peel and pith removed, for garnish
4 slices of lime, peel and pith removed, for garnish
4 slices (wedge type slices), green Kiwifruit, for garnish

To Prepare:
Prepare the dressing and marinade by adding the peeled green Kiwifruit, orange juice, lime juice, olive oil, ginger paste, sea salt, pepper, honey and thyme to a medium size bowl. Blend with an immersion blender (or use a stand type blender) till Kiwi is fully pureed and ingredients are fully incorporated. Set about 1/3 cup aside for dressing the salad and drizzling over the prepared halibut, and pour the rest over the uncooked halibut fillets in a shallow dish, coating each fillet well. Cover, and set aside to marinate while you prepare the Honey Ginger Macadamia nuts.
To prepare the macadamia nuts, combine the macadamia nut pieces, honey, ginger and sea salt in a small dish, pour onto a small foil lined baking sheet, and place under a broiler (500 degree), stirring frequently (about once per minute), until golden and toasted, about 5 minutes.  Watch carefully to prevent burning. Remove from the broiler, and allow to cool while you prepare the rest of the dish.
Prepare the salad by combining the cranberries, diced avocado, diced hearts of palm and salad greens in a large bowl.  Set aside while you pan-sear the halibut.
Place a large skillet over high heat, bringing the pan to high temperature.  Add in the olive oil, allow to heat about 30 seconds, and then place the marinated halibut fillets into the skillet (make sure the pan sizzles when you place the fish in, so you know it's hot enough!), removing any excess marinade.  Cook the fillets for 3-4 minutes per side, just until golden and just cooked through, being careful not to over cook.
While the fillets are searing, drizzle the salad with about 1/4 cup of the prepared Kiwi citrus dressing, add in the honey ginger macadamia nuts, and toss well to coat.  Place 4 very thin slices of kiwi on each plate ( 4 plates), divide the salad evenly over the kiwi slices, and place one pan-seared halibut fillet over the top of each salad. Drizzle some of the remaining Kiwi-citrus dressing over the top of each fillet, and garnish with a slice of orange, lime, and Kiwi.  Serve, and ENJOY!

And finally, to complete this delectable Bay of Plenty meal, it is time for dessert!  After the prior courses of elegant and delicious recipes, I wanted something simple, yet beautiful, and bursting with kiwi flavor to finish the meal off!  I have decided to use both the Green and Gold Kiwis for the dessert, and to serve them in a way that would show the beauty of the Kiwi.  The green Kiwi does lose some of it's color while baking, but the flavor is delicious, and this dessert couldn't be more simple! Small individual tarts of luscious slices of green and gold Kiwi, atop a simple gingersnap crust all combine to create the perfect ending to a delightful meal.  Sit back and enjoy these simple sweet delights while dreaming of your chance to go on an amazing Kiwi Adventure to the Bay of Plenty!

Simple Kiwi Tarts
Serves: 4

Ingredients:
1 cup gingersnap crumbs (crushed gingersnap cookies)
4 Tablespoons butter, melted
4 Zespri Green Kiwifruit
4 Zespri Gold Kiwifruit
2 Tablespoons honey
1/2 teaspoon cinnamon
1/4 teaspoon ginger paste

To prepare:
Lightly butter 4 small springform pans (about 3-4 inch) and preheat an oven to 350 degrees.  In a small bowl, combine the gingersnap crumbs with the melted butter, stirring well.  Evenly divide the crust mixture among the prepared pans, pressing very firmly into the bottoms (you can allow the mixture to sit a few minutes before pressing into the pans, to soften the gingersnap crumbs).  Place the pans into the preheated oven, and bake the crusts for about 7 minutes, until fragrant.  Remove from oven, but leave the oven set to 350.
Cut the peeled Kiwifruit into thin slices, place into a medium size bowl, and coat with the honey, cinnamon and ginger, carefully stirring to prevent breaking the Kiwi slices.
Evenly divide the Kiwi slices among the pans, topping each crust with spiraling glazed kiwi slices, alternating between placing green and gold Kiwifruit. Place into the heated 350 degree oven, and bake for 20-25 minutes, until Kiwi has softened.  Remove from oven, and allow the pans to cool about 15-20 minutes on a wire rack.  Carefully release the spring on the pans, and place each tart on a plate.  The crust should be still be warm with a crisp layer on the bottom, getting softer as it nears the Kiwi, being full of all of the delicious juice released from baking the kiwifruit.  You may serve the tarts as they are, or with a touch of freshly whipped cream, if desired.

Well, as you can see there are many ways to enjoy the delectable Kiwifruit!  I hope you will try experimenting in your kitchen with these beauties, or try my recipes!  And dream of the Bay of Plenty, and the adventure of a lifetime that could be yours, by simply following this link to the Great Kiwi Adventure and entering your information for the drawing! I hope you will find some Zespri kiwis in your area, and can appreciate the art and care that goes into the growth of each one! For more information on the Bay of Plenty, check out this link to the Bay of Plenty website.  All photos of the Bay of Plenty were used with permission by the Bay of Plenty Tourist board.  Take yourself on a Kiwi Adventure Today!!

Tuesday, September 14, 2010

The Results Are In!!!

Well, it is now time to reveal the winners of the 3 drawings for delicious Saucy Mama products!  I wish all of you could win, but after doing the random drawings, there are 3 winners who all had delicious ideas for using the Saucy Mama products!  Now we all have some great recipe ideas to use these really great products!  If your name is listed as one of the winners, please contact me here: The Kitchen Enchantress . Please send me your shipping info, and I'll have your package of goodies out to you soon!  Thank you to everyone that participated, and look for another giveaway before too long for another chance to win something through my blog!  I may even host a recipe contest at some point!  Without any further delay, THE WINNERS ARE:

1. For the Cracked Pepper Marinade and Hot Wing Sauce: Leland Jens Tocktoo Collins- with a delicious idea of using the Cracked Pepper Marinade on some Salmon Jerky!  Congratulations!!

2. For the Lime Chipotle Marinade and Chipotle Mustard: Merry Graham- with her delightful idea of using the mustard in a mascarpone cream for a ham and pear gallette! Congratulations!!!

3. For the Sweet Onion Marinade and Jalapeno Stuffed Olives: Stephanie R.- with her tasty idea of using the Sweet Onion Marinade in a quiche, and the Jalapeno Stuffed Olives in hummus!  Congratulations!!


I hope you all had fun participating!!  Thanks for helping to make my first giveaway a success!  I hope you all will enjoy your packages of Saucy Mama Products, and please, just email me at the link above with your shipping info to receive your products soon!

Thursday, September 9, 2010

Saucy Mama Sweet Onion Marinade and Jalapeno Stuffed Olives!

It is time for my third and final review of the Saucy Mama products, this time I am focusing on the Sweet Onion Marinade and the Jalapeno Stuffed Green Olives!  As I am a little delayed in posting this, I have extended the deadline for leaving your comments to September 12th, and the drawing will now be held September 14th!  So you have a few more days to leave a comment about how you would use any of the Saucy Mama products reviewed on my blog, for a chance to win your own set of 2 Saucy Mama products!  I am giving away 3 sets of 2 Saucy Mama products, so make sure to leave a comment at the bottom of this post if you like the sound of these products, you just might win them! Check my homepage after September 14th for the list of winners, and to see if you are a winner!  There will be contact info on that post, regarding how to get your set of products if you are a winner!  It's so fun hosting my first giveaway, I hope you all are as excited to get your own set of Saucy Mama products as I have been to use them!

The Saucy Mama Sweet Onion Marinade is a very tasty sauce and dressing.  I think it could really liven up a salad, and would be delicious as a marinade for just about any kind of meat.  I was extremely fortunate to receive a lovely quantity of freshly caught Wild Alaskan Salmon a few days ago, and was just looking for a delicious opportunity to use it! So I decided to try this sweet and slightly tangy marinade on my fresh salmon!  It was delicious!  No other seasoning was necessary, and the flavor is delightful!  Please, if you make this recipe, make sure to use Wild Pacific Salmon, not Atlantic or farm-raised, the flavor difference is drastic, and using farmed or Atlantic salmon will most likely be a disappointment.  Also, you may want to skip on pink salmon, as the texture will be quite soft.  I am quite choosy with salmon, because when you have the REAL thing (Wild Caught Alaskan or at least NW Pacific salmon), it is just over and beyond any other type of fish, for flavor and texture.  Firm, and meat like, it will add substance and wonderful nutrients to any diet.  And it just tastes delicious!  I hope you try this recipe for your next brunch with friends, it is simple, flavorful, and elegant, not to mention just really tasty!  Don't be intimidated by the mini-crepe making, it is not much different than making pancakes, and you can make them all ahead, then fill them with the delightful filling, and serve. Please enjoy my recipe for:

Mini-Crepes filled with Lemon Herb Creme and Sweet Onion Salmon

Serves: about 8
Prep Time: about 5-10 minutes
Cooking Time: about 20-25 minutes

Ingredients:
For the Sweet Onion Salmon:
1/2 pound Salmon Filet
1/2 cup Saucy Mama Sweet Onion Marinade

For the Lemon Herb Creme:
1 lemon, organic (so you can use the zest)
4 ounces Mascarpone cream cheese

3 Tablespoons dill, finely chopped
3 Tablespoons chives, finely chopped
1/4 teaspoon sea salt
1/2 teaspoon peppercorn blend, freshly ground

For the Mini-Crepes:

1 cup flour
2 eggs, lightly beaten
2 Tablespoons butter
1/2 cup milk
1/2 cup water
1/4 teaspoon sea salt

cooking spray
Garnish:
additional chopped dill and chives
additional Sweet Onion Sauce for dressing the top of each crepe

To Prepare:

1. First, preheat oven to 350 degrees. Prepare the salmon by placing the filet on a large sheet of foil. Cover the filet with the Saucy Mama Sweet Onion Marinade, and tightly wrap the foil up around the salmon, sealing all edges.  Place in the preheated oven, and bake for about 20 minutes, until marinade is bubbling, and salmon is firm and just cooked through.  Remove from oven, and allow to cool about 5 minutes.

2. While the Salmon is cooking, prepare the Lemon Herb Creme by first zesting the washed and clean lemon (removing the peel in very fine pieces, to add to the dish), adding the zest, and the juice of the lemon into a small bowl. Add the Mascarpone, herbs, sea salt and pepper, and stir well to combine.  Set aside.

3. Prepare the Mini-Crepes while the salmon is finishing cooking.  First combine all of the crepe ingredients (except the cooking spray) in a medium size bowl, and whisk until smooth and creamy (an immersion blender with a whisk attachment makes quick work of this step!). Place a skillet (8 inch or larger) over medium high heat, and lightly spray with cooking spray. Pour about 2-3 tablespoons of the crepe batter into the hot pan, twirling the pan with a circular motion until batter has spread to about a 4 inch round crepe. Cook for about 45 seconds (until crepe is just beginning to brown), gently use a spatula to flip the crepe over, and continue cooking about 45-60 seconds. Remove from pan and place on a plate. Repeat with remaining batter (lightly spraying the pan, then quickly cooking each crepe), until all of the batter is cooked, and you have about 16 mini-crepes on a plate.

4. Assemble the crepes:
First, use a fork to gently flake apart the cooked salmon filet, removing it from the skin as necessary.  Place a crepe on a flat surface, spread about 2 teaspoons of the Lemon Herb Creme over the center of the crepe, and add about 2 Tablespoons flaked salmon over the Lemon Herb Creme.  Gently roll up the crepe over the filling, and place on a platter.  Use a small spoon to drizzle a line of Sweet Onion marinade over the top of the filled crepe, and garnish with additional chopped herbs.  Repeat with remaining crepes.

5. Serve and ENJOY!


I also received a beautiful little jar of Saucy Mama Jalapeno Stuffed Olives to use my creativity on, and I think I came up with a delicious hot baked dip for your next gathering!  These Jalapeno stuffed olives really added a LOT of flavor to this artichoke cheese dip, giving it just a little hint of heat, but all of the delicious flavor!!  Simple to prepare, just combine the ingredients, pour into a baking dish, and wait for the deliciously wonderful flavor!!


Baked Jalapeno Olive Artichoke Dip
Serves: about 8-12
Prep Time: 5 minutes
Baking Time: about 30 minutes

Ingredients:
8 ounces cream cheese, softened
8 ounces sour cream
1- 8.5 ounce can artichoke hearts, quartered, and drained (not the marinated variety!)
1 cup Saucy Mama Jalapeno Stuffed Olives, chopped
1 cup Parmesan, Romano and Asiago cheese blend, shredded
1/2 cup Fontina Cheese (cut into small 1/4" cubes)
1/2 cup chives, freshly chopped
1/2 teaspoon sea salt
1/2 teaspoon peppercorn blend, freshly ground

1 baguette french bread, cut into slices, or any other small bread, such as sourdough
Chips for dipping (I have shown it with Sweet Potato and Beet chips, which were delicious, but you can also use Tortilla or any vegetable chip)
Vegetables for dipping (carrots, celery, etc...)

To Prepare:

1. First, preheat oven to 375 degrees. In a large bowl, combine all of the ingredients (first chopping the olives and cutting the Fontina into small cubes), stirring until well combined.  Pour into a 1 quart baking dish, cover, and place in the preheated oven. Bake until bubbling and just slightly golden on the edges (you can remove the lid for the last 10 minutes of baking for a more golden appearance if desired).

2. Once the dip is baked, remove from oven and carefully spoon into a serving dish (or leave in the baking dish to retain it's heat for a longer period of time).  Serve with a platter of bread slices, chips, and vegetables, and enjoy!!!

Wednesday, September 1, 2010

Delicious Chipotle!


It is time for my second post in the Saucy Mama review series, and I have some really exciting and delicious recipes and products to share with you today!  Today I am focusing on the Saucy Mama Lime Chipotle Marinade, and the Saucy Mama Chipotle Mustard!  Both of these products are equally delicious: smoky, slightly spicy, and incredibly flavorful, there are a multitude of uses for either of them!  I decided to stay within the theme of the Chipotle, and so both of my recipes feature southwestern flavors.  Don't forget to add your comments at the end of the post (giveaway guidelines can be found here) for your chance to win a set of Saucy Mama Lime Chipotle Marinade and Chipotle Mustard sent straight to you, for your kitchen!
So, what is Chipotle exactly? Chipotle chiles are smoked, dried jalapenos. When I use chipotle in a recipe, it adds a deep earthiness: slightly sweet, slightly spicy, warm and inviting.  It has such a well rounded flavor, and it imparts that flavor in a delightful undertone, enhancing any dish. I often use a small can of chipotle in adobo* to add amazing flavor to spreads for sandwiches, dressings for salads, and marinades for meats; so it's only natural that Saucy Mama has made some delicious chipotle products!
*(adobo is a tomato based sauce that generally has garlic, onions, salt, pepper and spices, stewed to a wonderfully thick and rich texture.)

The Saucy Mama Chipotle Mustard is a fantastic mustard, that would be perfect on any sandwich, or added in to dressings and marinades.  Tangy, a little sweet, and just bursting with flavor, I know you will be able to come up with some great uses for this mustard!  The recipe I am sharing with you today is amazing!  When I first thought of the idea for this Saucy Mama Chipotle Potato Salad, I had mixed feelings.  I happen to love my "good ole' standby" potato salad, with dijon, green onions, plenty of dill and red potatoes, and am very picky about potato salad in general, never enjoying a super market potato salad...  So I wasn't sure if I could really enjoy a Chipotle Southwestern style potato salad, or if I would just be thinking that I would rather have my old recipe. But I was amazed by the flavor when I had my first bite, and I truly enjoyed it!  The chipotle flavor was delicious, and I think that the ingredients I used really combined well with it!  I used a lovely blend of white, red and purple fingerling potatoes for this salad, but you could use any small potatoes that you have.  I wouldn't suggest using large baking potatoes, because the texture just won't be the same.  I hope you enjoy my recipe for:
 Saucy Mama Chipotle Potato Salad
Serves: 8-12
Prep Time: about 15 minutes
Cooking Time: about 15-20 minutes

Ingredients:

6 cups water for boiling the potatoes
1/2 cup green onion, diced
1/4 cup roasted green chile diced
1/4 cup red onion, diced
1/2 cup cilantro, finely chopped
1/4 cup Saucy Mama Chipotle Mustard
1/4 cup mayonnaise
1/2 teaspoon peppercorn blend, freshly ground (mine includes back, red and green peppercorns, coriander, and allspice)

To Prepare:

1. Add the water and sea salt to a large pot (3 qt.), place over high heat and bring to a boil.  Add in the chopped potatoes, and cook for 15-20 minutes, until potatoes are fork tender. Drain the cooked potatoes into a colander and allow to cool about 10 minutes.

2. While the potatoes are cooling, dice the red pepper, green onion, green chile and red onion, and place them into a medium size bowl.  Chop the cilantro and add it in to the bowl.

3. Add the Saucy Mama Chipotle Mustard, the mayonnaise and the pepper into a small bowl, and stir well to fully combine.  Add the slightly cooled potatoes to the bowl of diced vegetables, and pour the combined dressing over the potatoes. Gently stir to coat the potatoes evenly and incorporate the vegetables.

4. Cover, and place in refrigerator until ready to serve. Best serve chilled.  Enjoy!


I also made a delicious recipe with the Saucy Mama Lime Chipotle Marinade!  We LOVE salad rolls around here, but have always made them with an Asian inspired flavor.  But I just had to try this marinade on some shrimp, and thought it would make a delicious salad, but wanted a party friendly recipe, so I took it a step further, and voila!  Saucy Mama Lime Chipotle Salad Rolls!!  The perfect hand held snack, light, crisp, refreshing, and so delicious, I am sure these will be a hit with your family and friends!  They go together very quickly, and I had a plate of 12 salad rolls before I knew it!  The grilled Lime Chipotle shrimp were amazing, and I made a creamy Lime Chipotle dip to go along with it!  I hope you enjoy these as much as we did!

Saucy Mama Lime Chipotle Salad Rolls:

Serves: 6-12 (depending on if you want one or two!)
Prep Time: about 20 minutes
Cooking Time: about 6-7 minutes

Ingredients:
1/2 pound (about 36) medium size shrimp, peeled, deveined, and cleaned
1/4 cup Saucy Mama Lime Chipotle Marinade, plus
2 Tablespoons Saucy Mama Lime Chipotle Marinade, divided
1/2 cup sour cream
12 lettuce leaves (I used green leaf lettuce)
2 green onions
1 cucumber, medium
1 red bell pepper, medium
1/2 red onion, small
1 avocado
1 cup grape tomatoes
1 handful cilantro
12 spring/salad roll wrappers (round rice wrappers, found dry in the Asian food section)

To Prepare:
1. First, marinate the shrimp by combining the cleaned shrimp with the 1/4 cup Saucy Mama Lime Chipotle Marinade in a small dish.  Stir well, cover, and place in refrigerator for about 10 minutes. Preheat a grill to medium high heat while shrimp marinates.
2. Prepare the Lime Chipotle dip by combing the 2 Tablespoons Lime Chipotle Marinade and the sour cream. Stir well, cover, and place in the refrigerator until ready to use.
3. While the shrimp is marinating, prepare the vegetables, by cleaning the lettuce leaves (set them aside), and then slicing all of the other vegetables, and the avocado, into long thin slices, about 4 inches long.  See photo for detail:
4. Remove the shrimp from the fridge, and place them onto bamboo skewers, filling the skewers completely with shrimp.  (Tip: Pierce the shrimp length-wise with the skewers, so that the shrimp remain fairly straight while you cook them!) Place the skewers on the hot grill, and cook until pink, about 2-3 minutes per side. Remove from grill, and gently remove from the skewers, placing onto a plate.
5. Assemble the rolls, by first adding hot tap water to a large shallow dish (like a baking sheet or very large deep plate), and place one rice wrapper into the water.  Allow to soak about 30 seconds, until softened. Place the wrapper onto a large cutting board (gently shaking out the excess water), smoothing out into a circle.  Place a lettuce leaf in the center of the wrapper, and then add a couple pieces of each vegetable, spreading evenly over the lettuce.  Add 3 shrimp  in a row on the top.  See photo below for detail:
Roll tightly, but gently, by pulling the bottom edge over the filling, folding in both sides, and then rolling up to the top. Repeat with remaining wrappers until all the shrimp and vegetables are used.
6. Serve the Lime Chipotle Salad Rolls with the prepared dipping sauce, and enjoy!

I hope you all enjoy these recipes, and make sure to post your comments below and let me know how you would like to try these great Saucy Mama Chipotle products in your kitchen!

Sunday, August 29, 2010

Saucy Mama Hot Wing Sauce and Cracked Pepper Marinade!

Today I will be featuring two wonderful Saucy Mama products, Hot Wing Sauce and Cracked Pepper Marinade! I truly enjoyed both of these products, and I think I came up with two different recipes that will be great for your next party, or evening with guests! Make sure to leave your comments at the end of the post, to have a chance to win your own set of Saucy Mama Hot Wing Sauce and Cracked Pepper Marinade! Read the guidelines of the giveaway here. I am always trying to come up with new recipes, and love to create new things to share with friends!  The Saucy Mama Hot Wing sauce is an incredibly flavorful sauce, with just the right amount of heat!  I don't often make hot wings, but this is definitely a sauce I will love to use in many recipes!  I liked the Hot Wing Sauce so much in fact, that it inspired me to create a new way to eat hot wings, without all of the mess, but still full of all of the great flavors of a great hot wing!  I thought back to the best tasting hot wings I had ever had, a small brewery in a charming Bavarian style town called Mount Angel in Oregon.  I wanted to recreate the flavor of that moment in my own way, and the Saucy Mama Hot Wing Sauce really made the recipe turn out delicious! Very simple to make, quick and delicious, and perfect to place a plate out for friends or family, these Saucy Mama Hot Wing Rolls are great! With crisp celery, melting blue cheese and flavorful and spicy moist chicken, all wrapped and fried like an egg roll, they are sure to please! Enjoy the flavor, and enjoy not having all the mess!!
Saucy Mama Hot Wing Rolls:

Prep Time: about 15 minutes
Cooking Time: about 8 minutes total
Serves: about 12 (makes about 12 rolls)

Ingredients:
2 cups cooked Chicken, diced *(Rotisserie chicken works great for this, but you can also just dice up your choice of chicken meat (tenders, thighs, breasts, etc), and cook quickly in a small amount of olive oil.)
1 cup Celery, diced
1/2 cup Green Onion, diced
4 ounces Blue Cheese, crumbled
1/2 cup Saucy Mama Hot Wing Sauce
12 egg roll wrappers

To Prepare:

1. Place the diced chicken, celery, green onion and blue cheese crumbles into a large bowl. Stir well to combine.
2. Pour the Saucy Mama Hot Wing sauce over the bowl of combined ingredients, and stir well until fully incorporated.
3. Place a large saucepan (3 qt. or larger) over medium high heat, and pour about a 4 inch depth of cooking oil into the pan, bringing it to a high temperature for frying.  Or prepare a deep fryer if you have one. 
4. While the oil is heating: On a flat surface, place one egg roll wrapper so that it looks like a diamond in front of you. Dip your fingers in a shallow dish of warm water, and moisten the outer inch of all edges. Place about a quarter of a cup of filling in the center of the wrapper, spreading it to about one inch from the sides. Starting at the bottom, fold the bottom edge up over the filling tightly, fold both sides in, and then continue rolling tightly up to the end of the wrapper. Place aside, seam side down, and continue wrapping the remaining rolls until all filling is used.
5. When the oil sizzles when a test piece of egg roll wrapper is placed in: Gently place about 4 Hot Wing Rolls in at a time, frying about 2 minutes, until golden brown and crisp. Remove with stainless steel tongs and place on a plate lined with paper toweling to drain while you finish frying the remaining rolls. Place on a platter, serve, and enjoy!


I was also fortunate to try the really intensely flavored and rich Cracked Pepper Marinade! Full of delicious bits of Cracked pepper, red pepper flakes, and the delightful taste of soy sauce, this sauce will really liven up a lot of dishes!  It's zingy, yet just slightly sweet, and I think it would be great with grilled meats or veggies, or even used as a base for salad dressings or bread dipping oils.  If I am ever making recipes for a party, I try to think of some non-fried options, full of great vegetables and unexpected flavors.  I like to think of my next recipe as a little Amuse-bouche if you will, an intensely delicious mouthful to tantalize your guests taste buds for the next course.  Not only is it full of flavor, but very simple, and perfect for the soon arriving Autumn season! I hope you enjoy my recipe for:

Saucy Mama Cracked Pepper Wheels:

Prep Time: about 15-20 minutes
Cooking Time: about 25 minutes
Serves: up to 12 (makes 24 slices)

Ingredients:
2  large sweet potatoes, you will need 24 - 1/4" slices
1/4 cup, plus 2 Tablespoons Saucy Mama Cracked Pepper Marinade
1 large Portobello mushroom cap, about 2 cups diced
1/2 cup green onion, diced
1/4 cup walnuts, chopped
2 ounces Gorgonzola cheese, crumbled

To Prepare:

1. Preheat an oven to 400 degrees. Peel the Sweet potatoes, and cut into 1/4" thick slices, about 12 per potato. Pour a 1/4 cup of the Cracked Pepper marinade into a dish (reserving the additional 2 Tablespoons), and dip the sweet potato slices in, coating all sides, and placing the coated sweet potatoes onto a foil lined baking sheet.  Place into the preheated oven, and bake until caramelized and fork tender, about 20 minutes, turning once half way through baking time.

2. While the sweet potato slices are baking, prepare the mushroom topping.  Heat a large skillet (10 inch or larger) over medium high heat.  Add in the diced mushrooms, green onions, and chopped walnuts, stirring constantly.  Pour in the reserved 2 Tablespoons Cracked Pepper Marinade, and continue to cook quickly, about 2-3 minutes, until mushrooms are golden and soft. Remove from heat, and place into a bowl.  Add in the crumbled Gorgonzola cheese, stirring gently just to combine.

3. When the Sweet Potato slices are tender, remove pan from oven and top each slice with the mushroom topping, dividing evenly among the slices.  Return to the oven, and continue to bake about 5 minutes, until the Gorgonzola cheese is golden and bubbling. Remove from oven, use a spatula to place the Cracked Pepper Wheels onto a platter, and allow to cool about 10 minutes before serving to guests, so that they may pick them up and fully enjoy without burning their fingers! 


-I can't wait to hear your ideas for these two wonderful sauces and marinades!  Let me know what you think, and you just might get these two great products delivered to your door, for you to create in the kitchen with and share with your own guests!

Great Products and Great Recipes!

Now here is a first for me on the Kitchen Enchantress Cooks!  I am pleased to share my first review with you all, and I get to start with some really great products!  I was shipped a lovely large box of sauces, marinades, mustards and olives from a wonderful company called Saucy Mama, for me to review and host a giveaway on my blog!  Here is a picture of the wonderful variety that I received:
 And the really great news?!  Saucy Mama sent me two of each kind, one to try and create recipes with, and the other to share with my readers!  I have had no trouble coming up with some terrific recipes, these products are very flavorful, and add a delicious touch to everything that I've used them in!  I have decided to share one recipe for each type of product, and will be sharing them in 3 different blog posts.  I will feature two different products per post, and will be giving away the same two products that I review each post to you, my readers!  So you will have 3 different chances to win a set of two of these products to try out yourself!

The rules for the giveaways are:


1. Post a comment on the blog posts featuring Saucy Mama products, and let me know how you would use the products mentioned in the post!  You can comment as many times as you like, sharing as many recipe ideas as you would like, and receive an entry for each comment!


2. You must sign in to comment or leave your first name and last initial in your post so that I can keep track of who is commenting, so that you can win!


3. You must leave your comments by the end of September 10th, 2010, and the winners will be posted on September 12th, 2010.


The winner of each post will be chosen by random drawing of all comments received, so the more you take part, the better your chances of receiving a set of your own Saucy Mama products to use!  I know you will enjoy these great products as much as I am, and look forward to sharing the Saucy Mama love with you all!  Look for the first blog post review and recipes later today, with the other two posts following within this next week!  I can't wait to hear your ideas, so start thinking: what would you do with some delicious Saucy Mama products?!

Saturday, August 21, 2010

A Fun Contest for the Kids! :)

Here is a link for a very fun contest for kids: the Avocado Dress-Up Contest! If you follow my blog, by now you must know how much I LOVE Avocados from Mexico!  I use avocados quite often in my cooking, and love the nutritious benefits!  Well, now your kids have a chance to participate in a really fun contest by printing out the coloring page found here, with a chance to win up to $250!! There are 3 categories: 4 and under, 5-9, and 10-12!  So print one out today, and get your kids coloring delicious avocados for a chance to win a great prize! The Deadline is September 10th, so start coloring and have fun! While you're at it, create a wonderful dish using Avocados from Mexico: here are a few photos to get your tastebuds going, from the Avocado Dress-Up website!

I wrote this blog post at the request of Avocados from Mexico, making me eligible to get a $25 iCARD gift card.

Thursday, August 19, 2010

Huevos Tacos of Enchantment!

Today Eggland's Best brand Eggs have inspired me to create a new and amazingly flavorful dish, enhanced with delicious ingredients from The Land of Enchantment: New Mexico!  Eggland's Best is hosting a contest for bloggers, looking for delicious recipes that include their wonderful eggs!  Eggland's Best is the brand I turn to at the grocery store, my favorite variety being the Organic Cage Free-Vegetarian Fed-Brown Eggs, as close to the local farm fresh eggs as you can get at the market! These eggs really are great, just full of Vitamins, Omega 3 fatty acids, Protein, and more, they're sure to start your day off right! Find the Nutritional Info here. Pairing these wonderful eggs with Blue Corn, Green Chile and Pinon (Pine Nuts), make for a fabulous breakfast, brunch, lunch, or even dinner meal!  Simple and Delicious, these tacos are great for family meals, or to make for guests!  Enjoy this recipe for "Huevos Tacos of Enchantment"!
Huevos Tacos of Enchantment

Serves: 3-6 (depending on if you have 1 or 2 tacos per serving)
Prep Time: about 10 minutes
Cooking Time: about 10 minutes total

Ingredients:
4 ounces cream cheese (you can substitute Neufchatel cheese if you like)
1/2 cup chopped green onion, divided
1/4 cup Pinon (pine nuts), divided
1 teaspoon Sea Salt and Pepper blend, freshly ground (my blend includes red, green, and black peppercorns, coriander, allspice and sea salt; but you can just use salt and pepper blend if that is all that you have available)
6 Eggland's Best Eggs- Large- grade A
6 Blue Corn Tortillas
1/4 cup Roasted Green Chile, chopped
 
cooking spray

To Prepare:
1. In a small bowl, combine the cream cheese, 1/4 cup of chopped Green Onion, 2 Tablespoons of Pinon (pine nuts), Sea Salt, and Peppercorn Medley, stirring well until fully combined. Set aside. Crush the remaining pine nuts until fine, set aside with the remaining 1/4 cup of chopped green onion.
2. Spray a large skillet (10 inch or larger) well with cooking spray.  Place over medium high heat.  While the pan is heating, crack the 6 eggs into a medium size bowl, and scramble with a fork or egg scrambler until light and creamy.  Pour into the pre-heated pan, turn heat to medium and cook, stirring often, until just cooked through, but still moist.  Remove from pan immediately and place into a bowl. Set aside.
3. Spray a large skillet (10 inch or larger) well with cooking spray, and place over medium high heat. While the pan is heating, evenly divide the cream cheese mixture onto the 6 blue corn tortillas, keeping the mixture on one half of the tortillas, leaving one half empty.  Evenly divide the scrambled eggs over the tortillas, laying the eggs on top of the cream cheese mixture.  Evenly divide the chopped green chile over the scrambled eggs layer.
4. Once the pan is hot, add the prepared tortillas to the pan (I can fit 3 at a time in my pan). Once the tortillas have softened, about 1 minute, fold the empty side of each tortilla up over the filling, forming the tacos.  Flip over gently with a spatula and cook for about 2 minutes per side, till warmed through and slightly crisp. Remove from pan, and repeat with remaining prepared tortillas.
5. Once tacos are cooked till slightly crisp and puffed up, set on a plate, and garnish with remaining green onions and the crushed pinon (pine nuts). Serve and ENJOY!!! You may want one or two tacos, but they are incredibly satisfying and filling, and I found one to be perfect!